myOnvent for EXHIBITORS – Booth set up
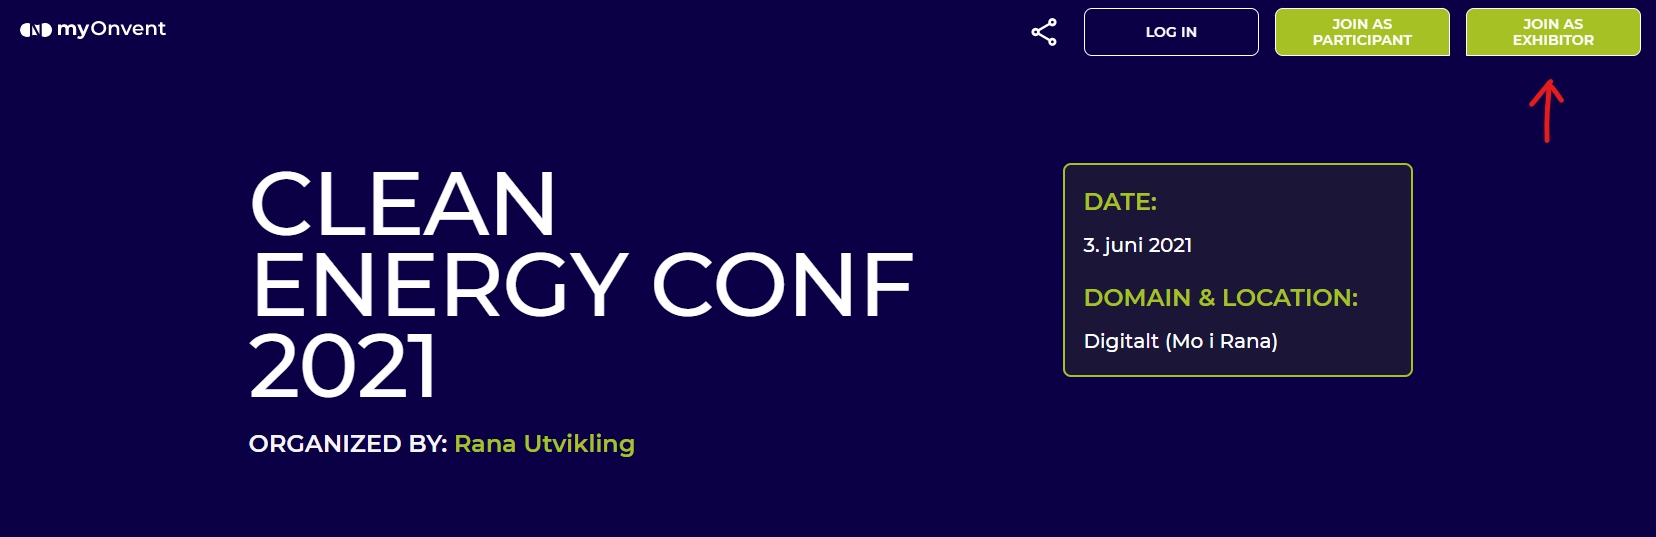
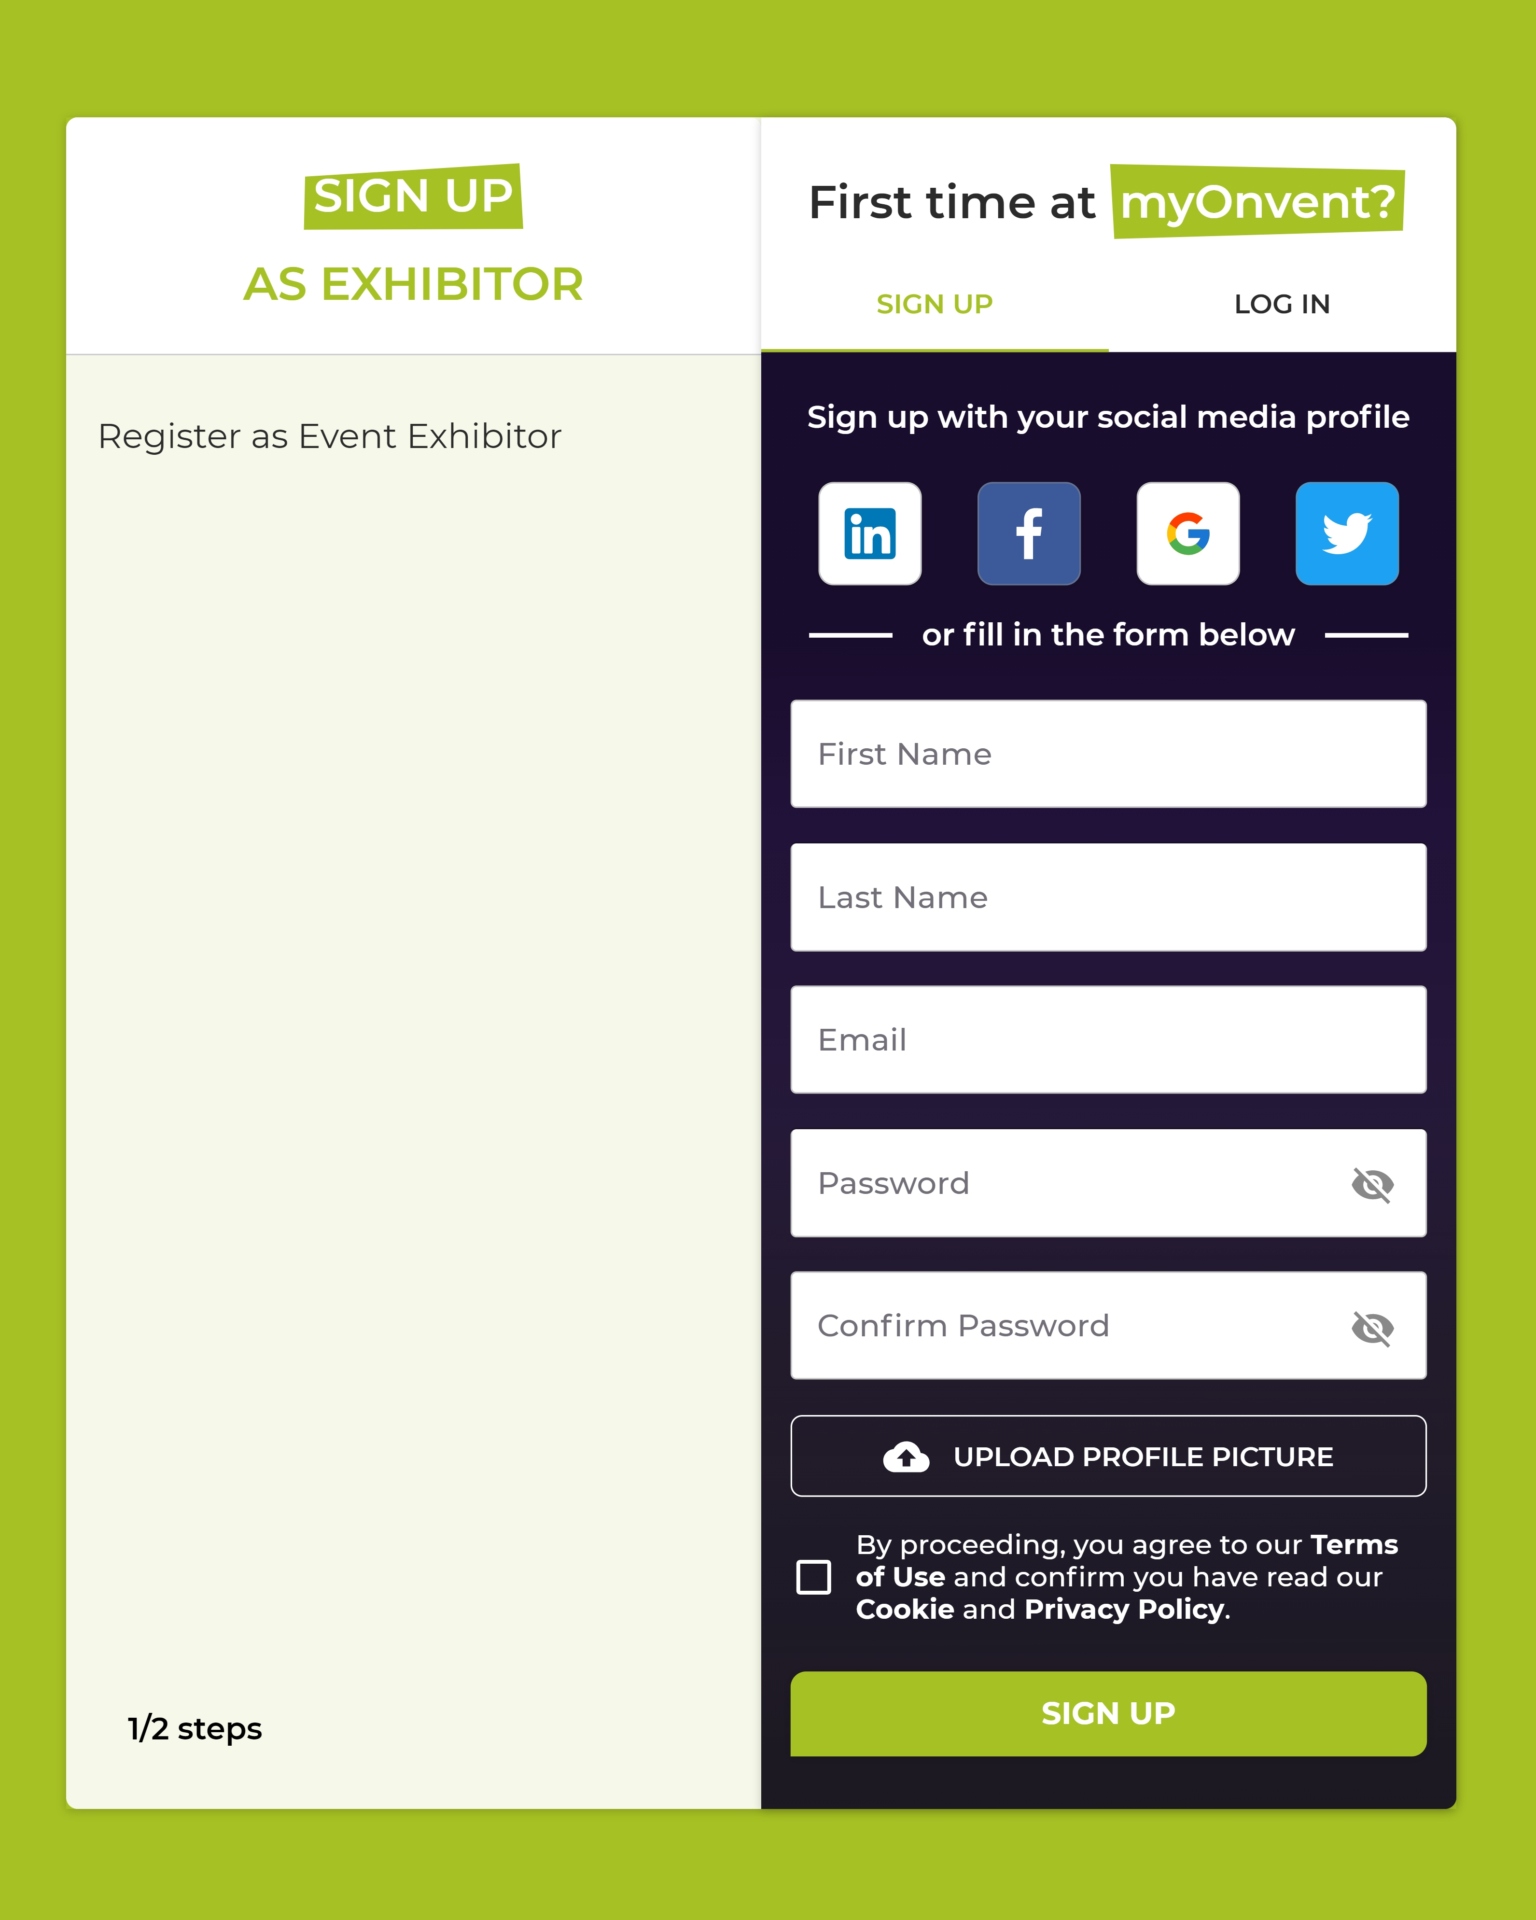
Register for the event as Exhibitor by clicking here
Note that if you’re already registered as a PARTICIPANT, you need to contact Stian at Kunnskapsparken Helgeland to be able to register a booth.
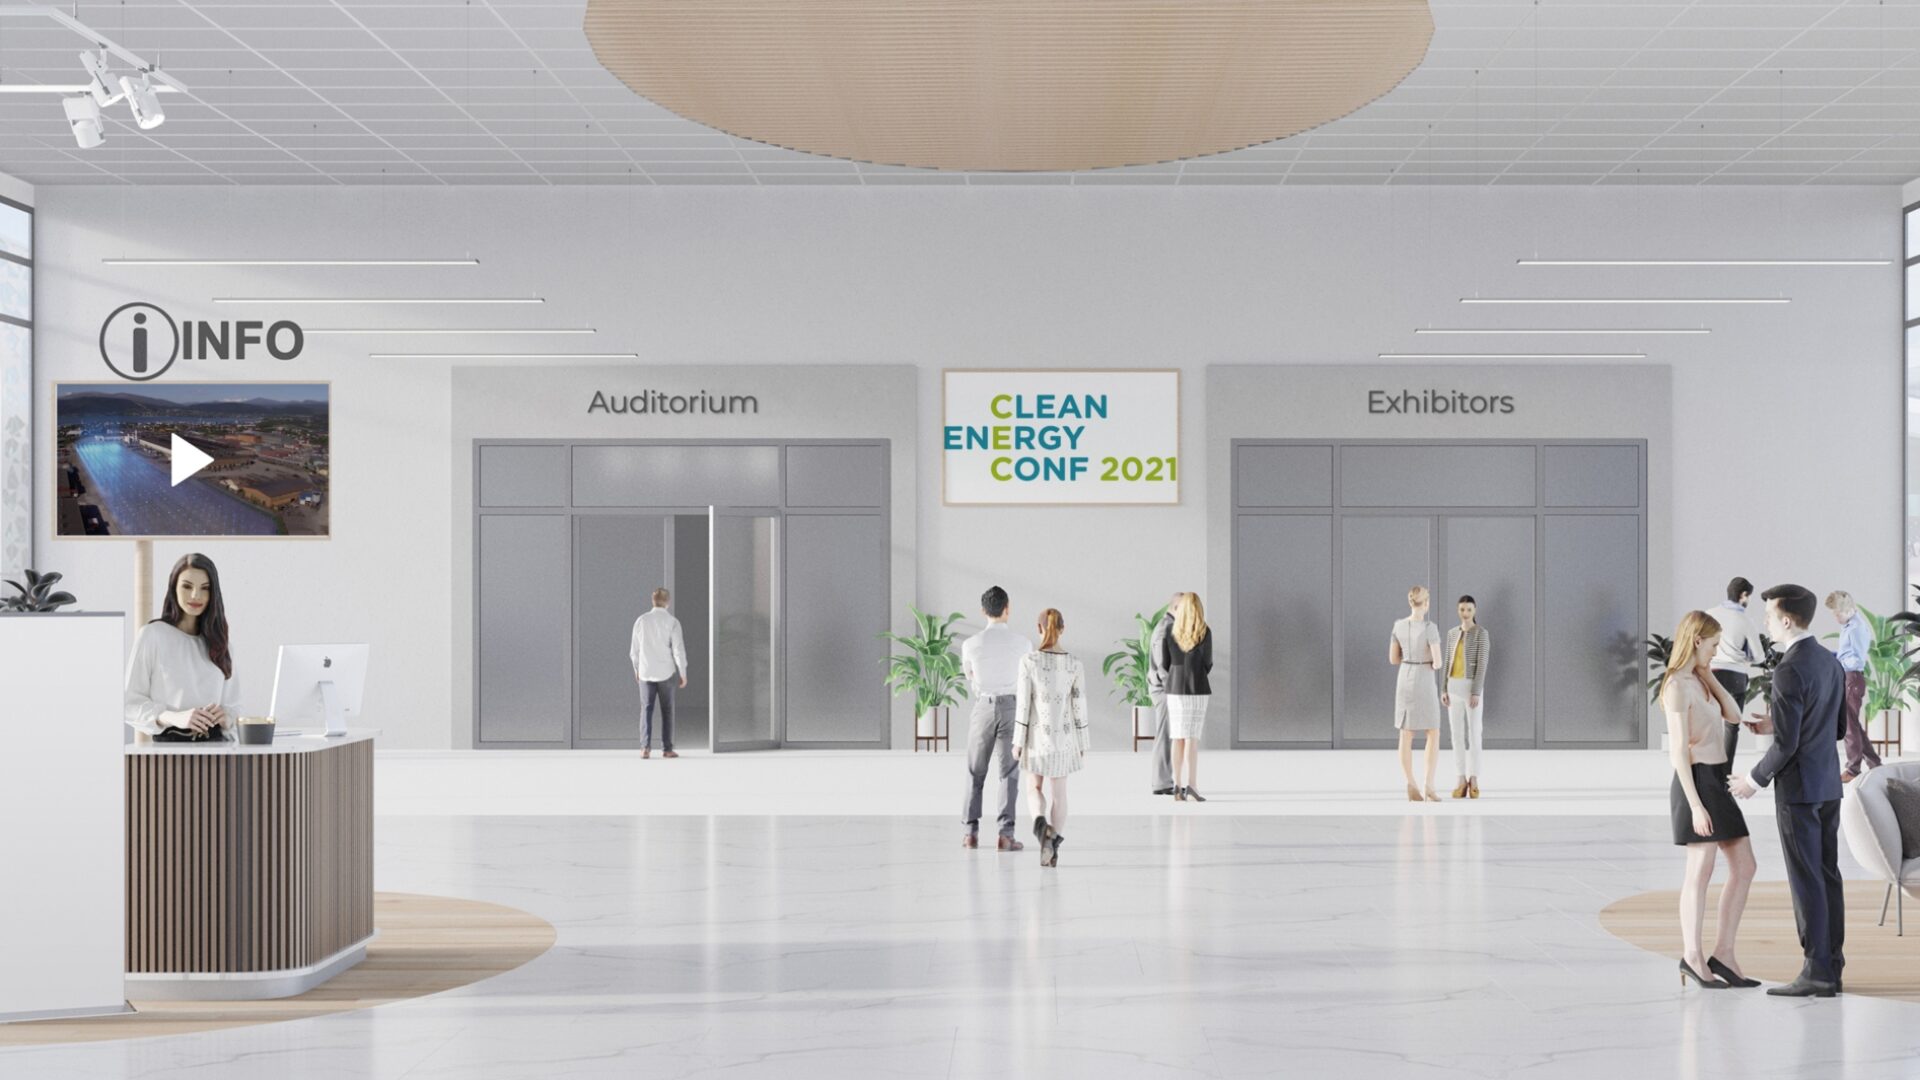
After the registration, please inform the Event Organizer, so your Booth would be confirmed and visible in the Exhibitors hall. Until your Organizer confirms your registration, you can manage your booth, but you will not be able to overview it.
Exhibitor can only manage a booth from the account it was registered with. If you would like your colleagues to have an access and manage the booth, please share your email and password with them, so they could log in as an Exhibitor.
1. JOIN AS EXHIBITOR (Not necessary if you clicked direct link above)
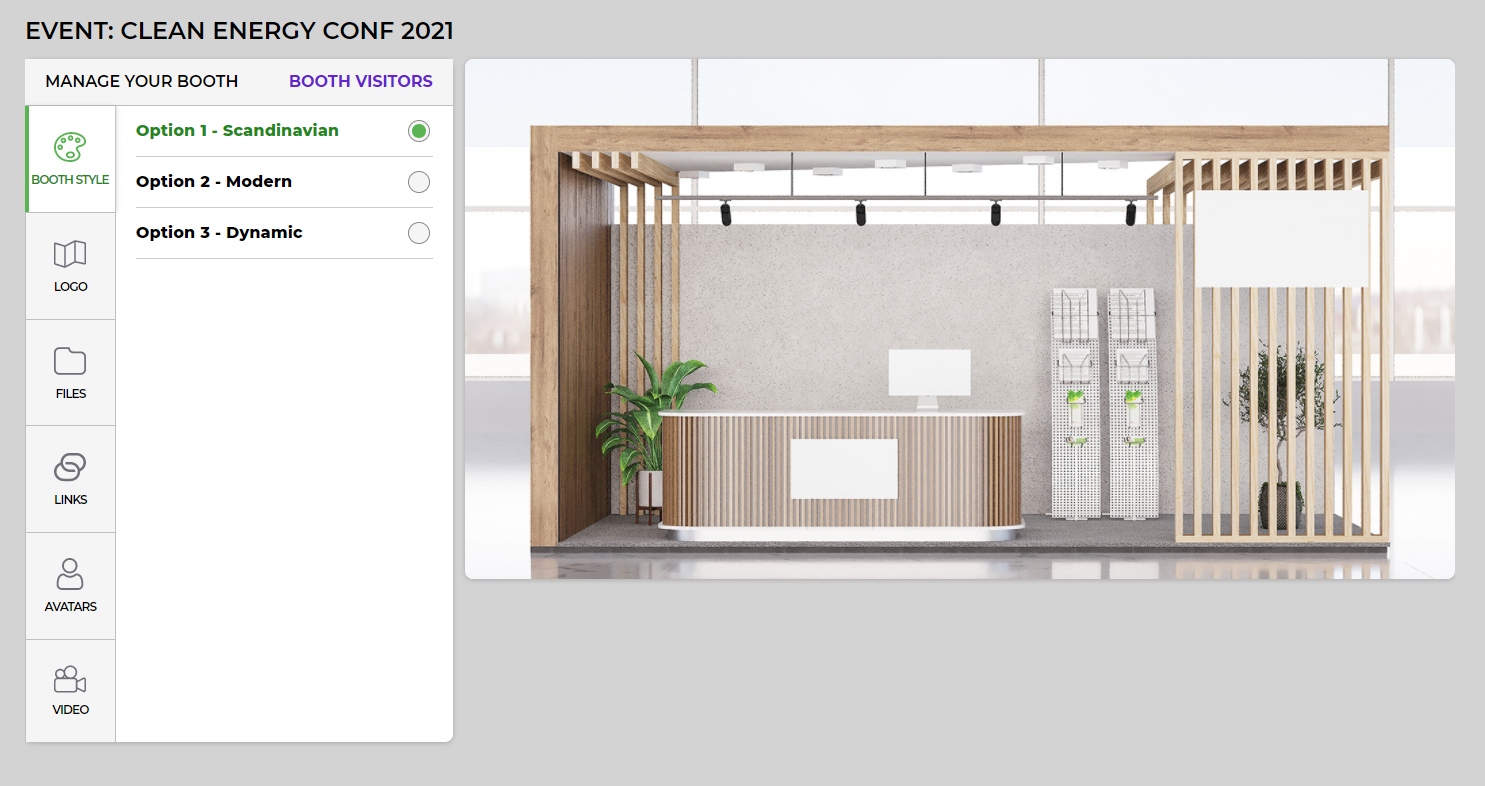
2. Choose your Booth Style from 3 possible options
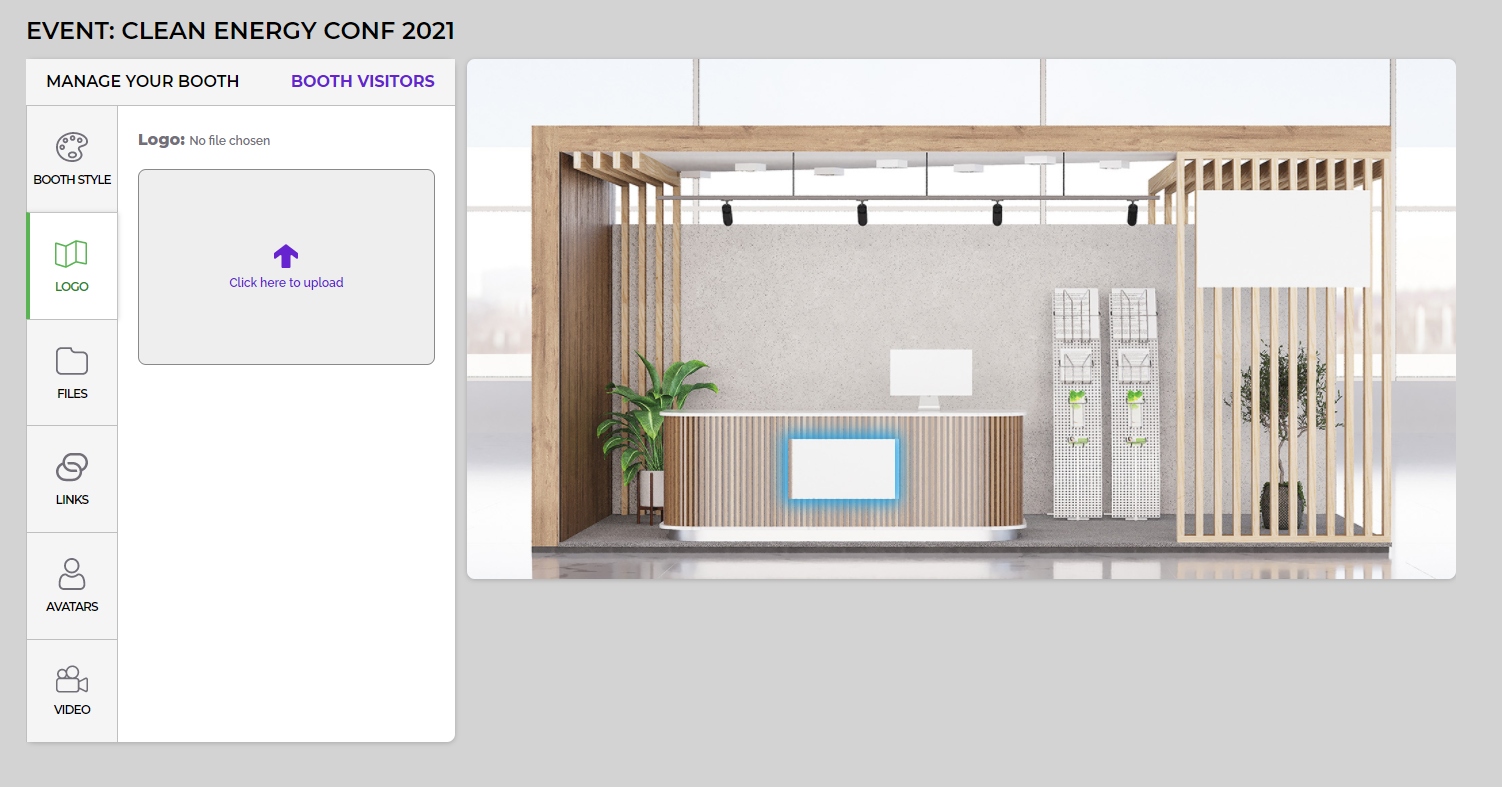
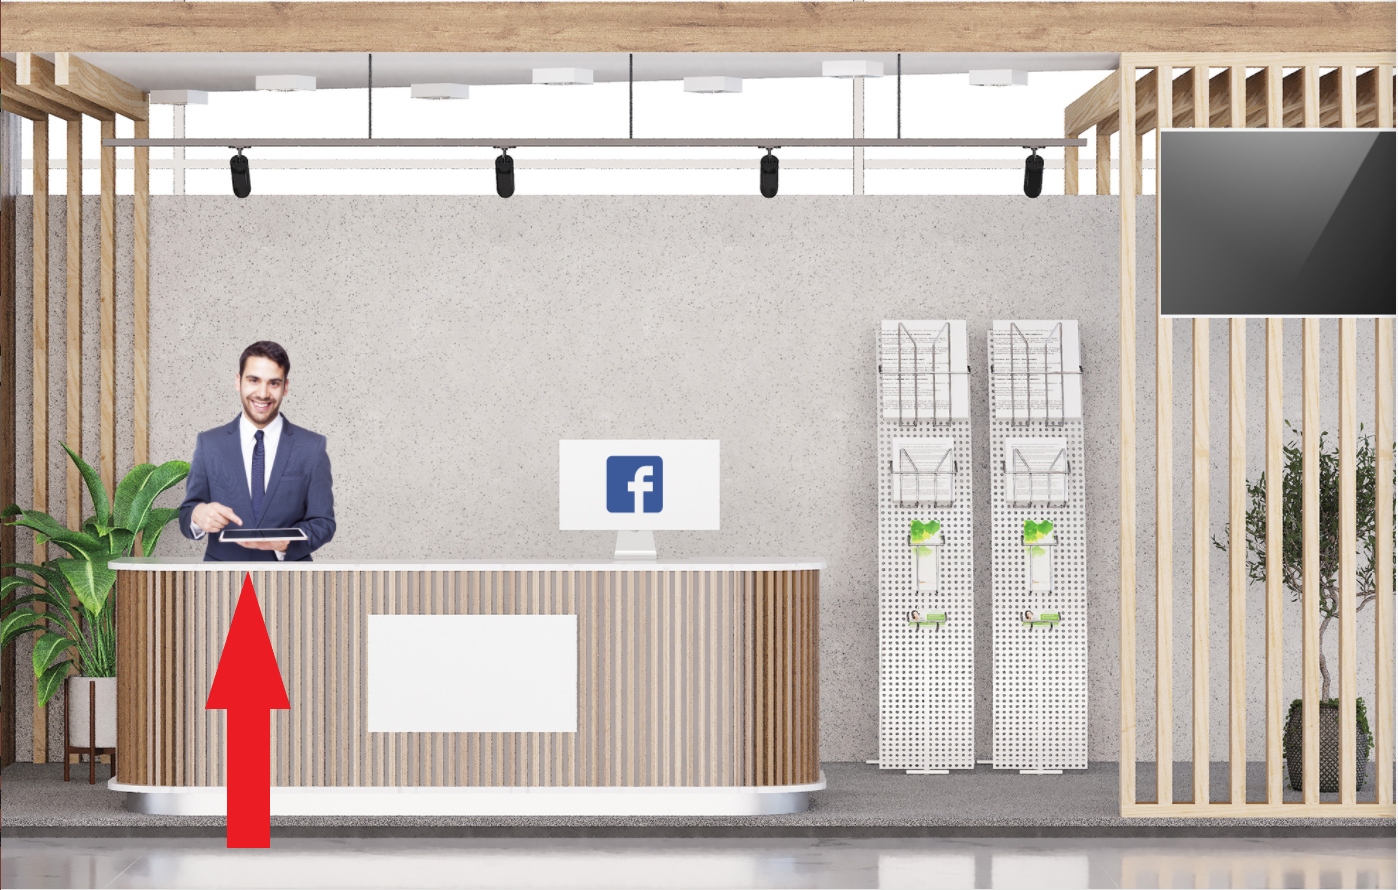
3. Upload your company logo, it will appear in front of your Booth desk (file type: jpeg.,, png.)
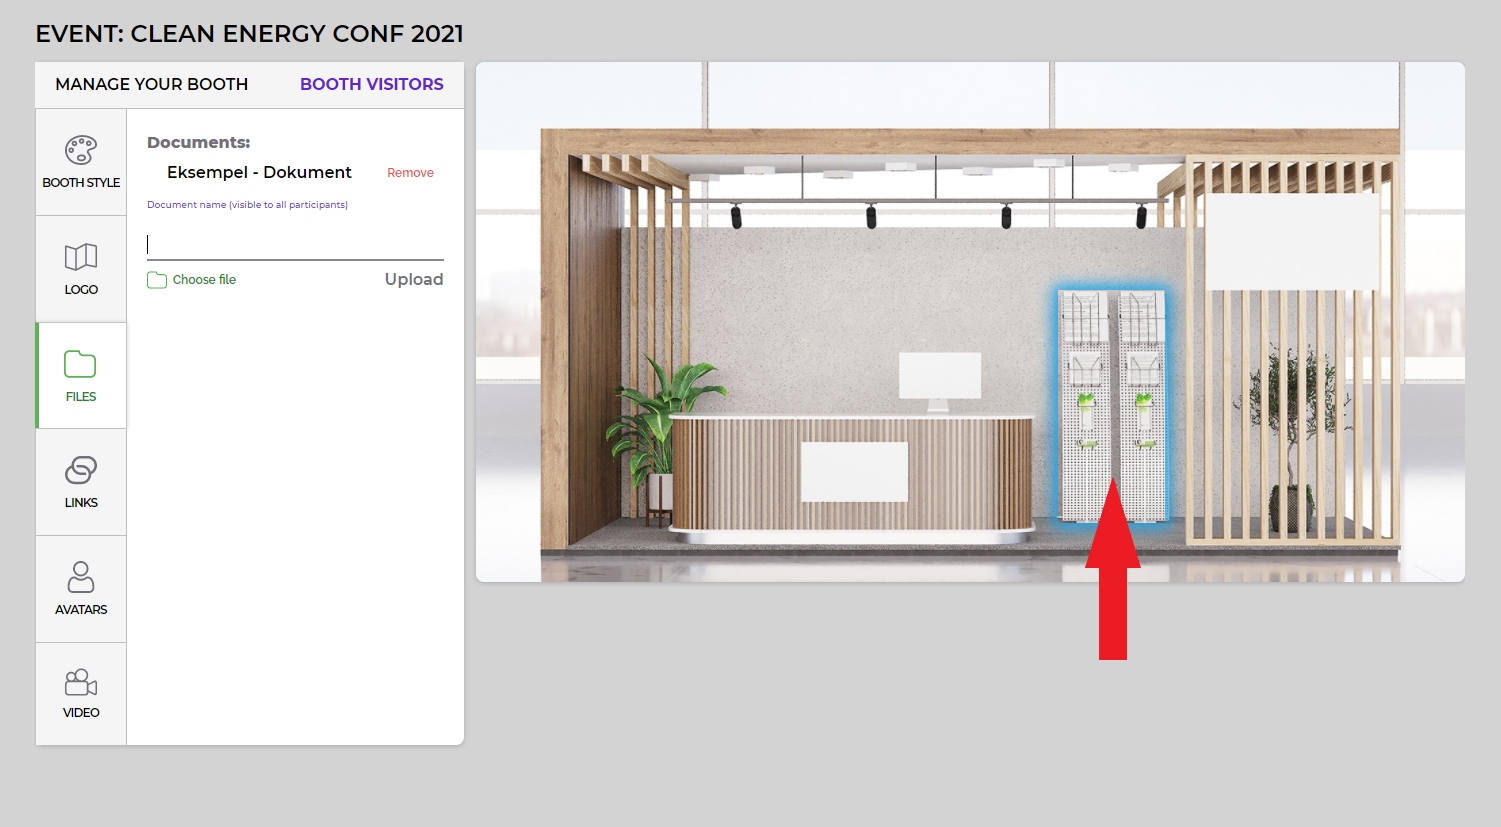
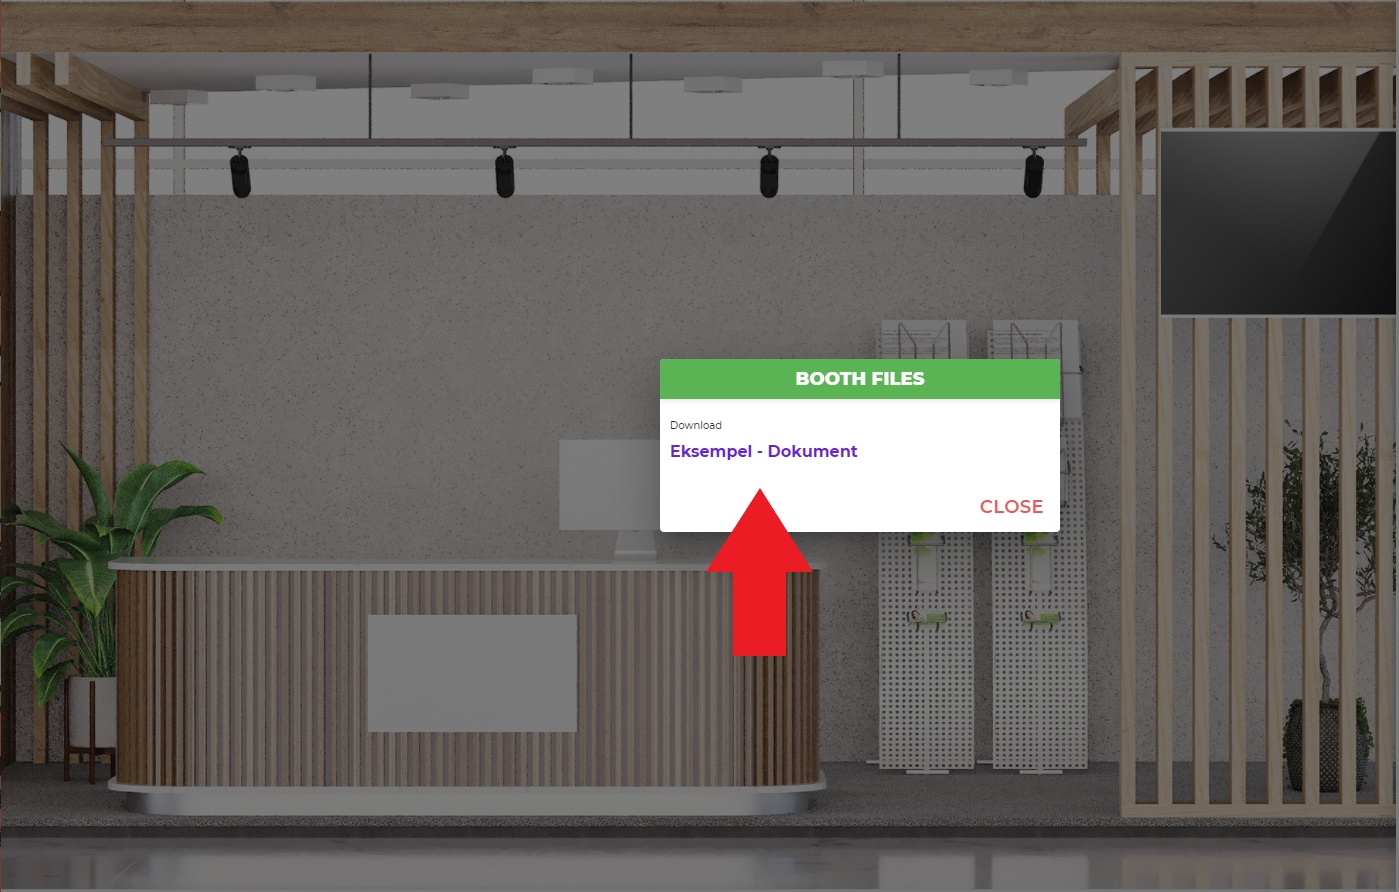
4. Upload files you would like to share with participants (max. 10 MB each file, number of files are not limited)
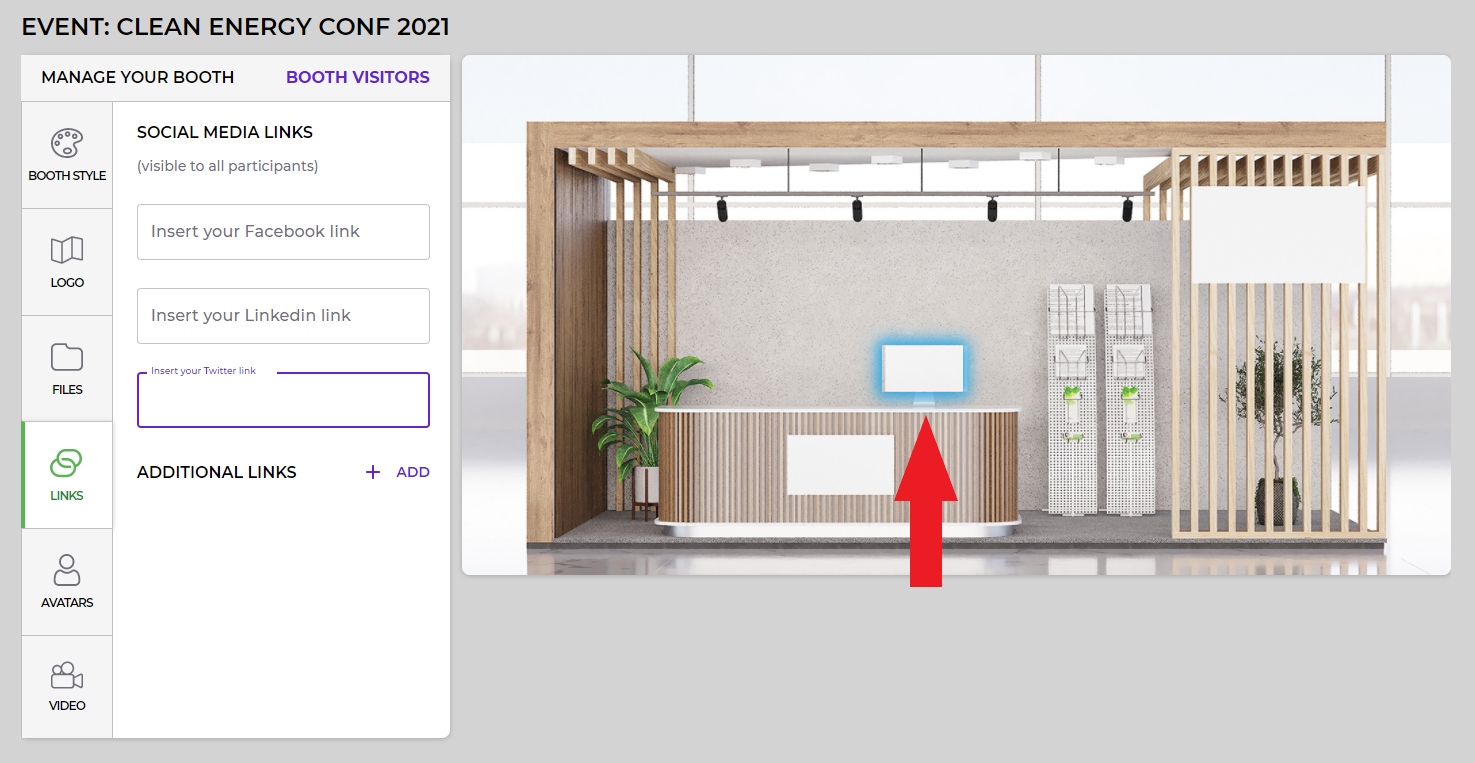
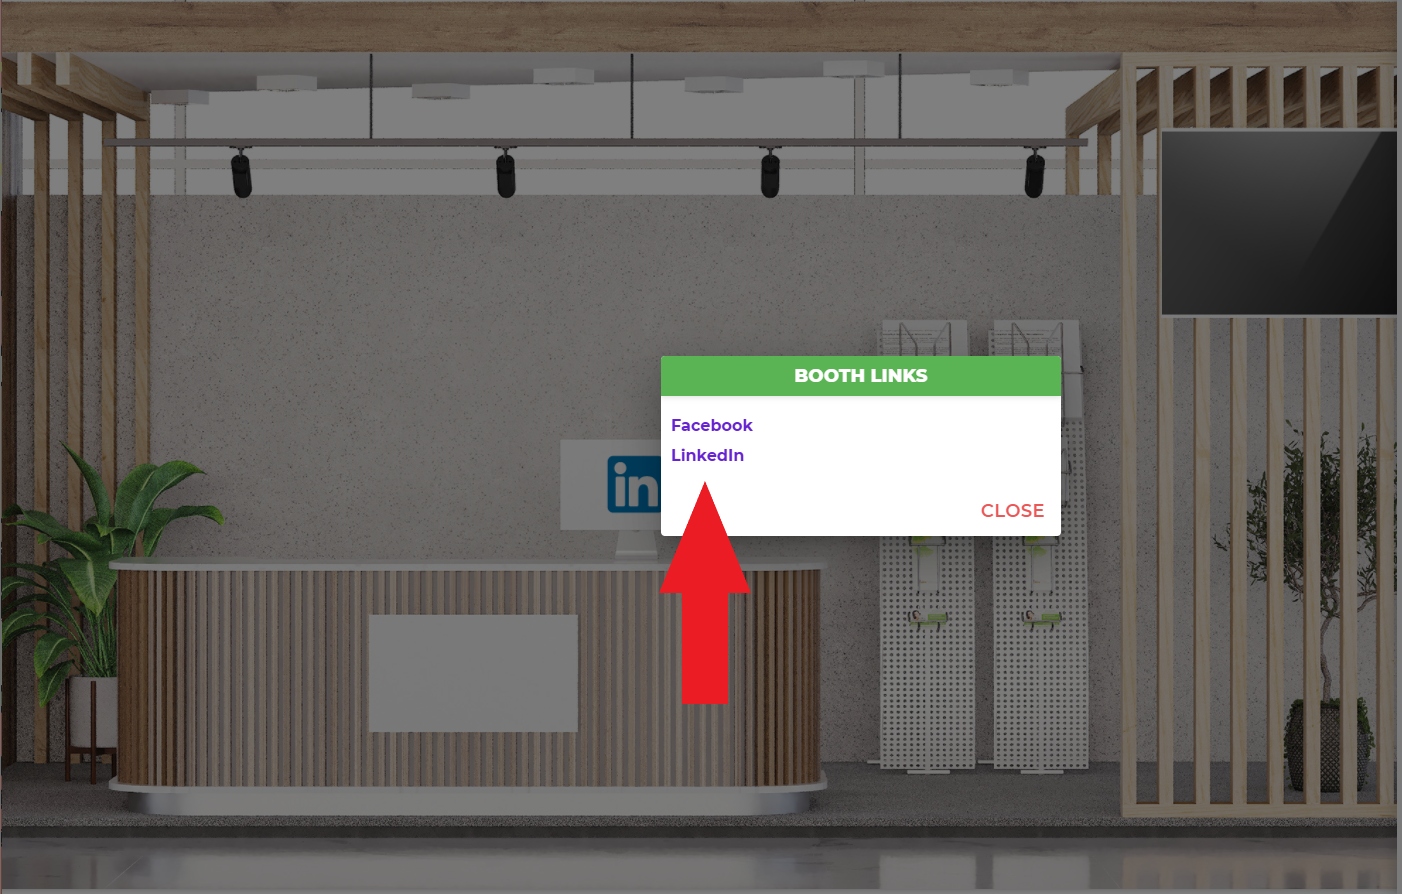
5. Add links, you would like to share with participants
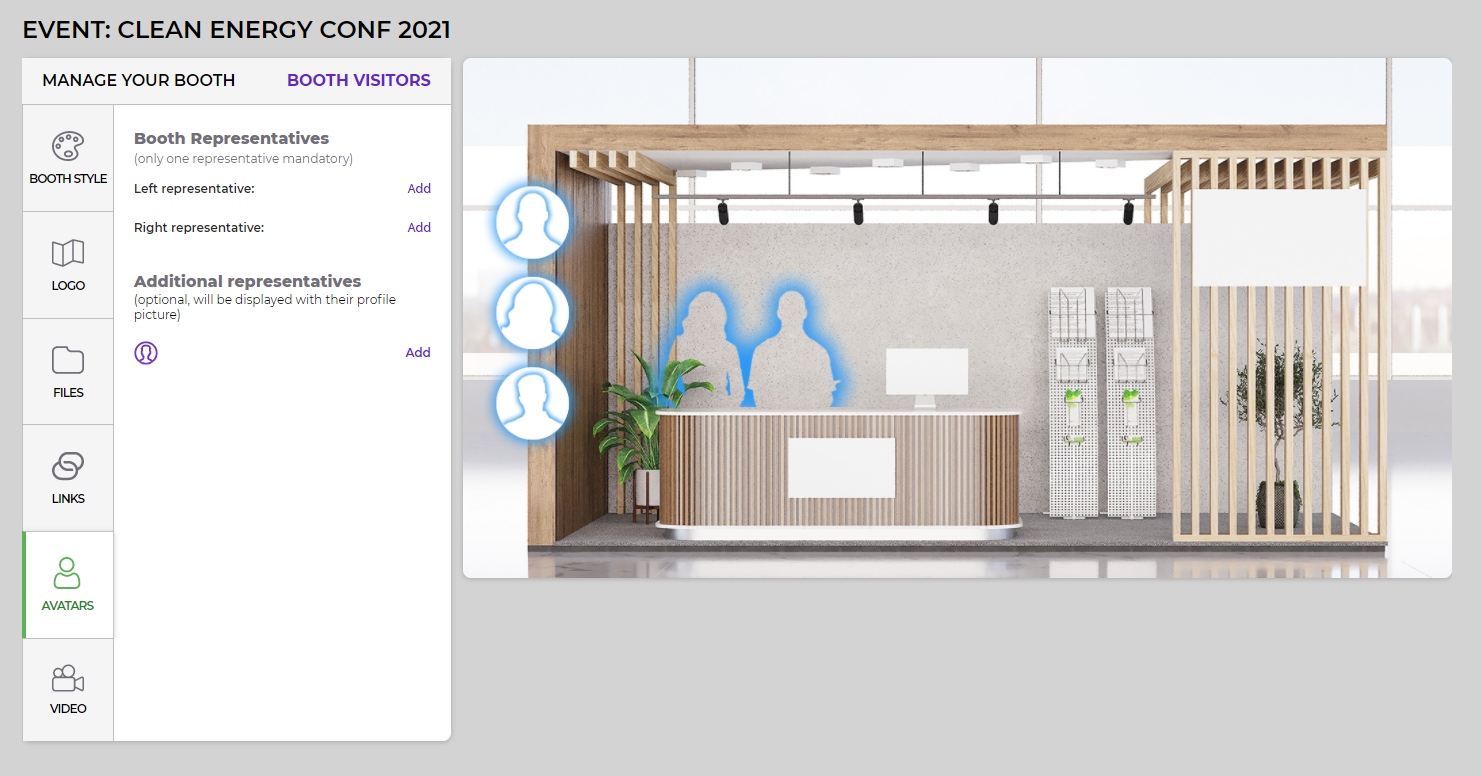
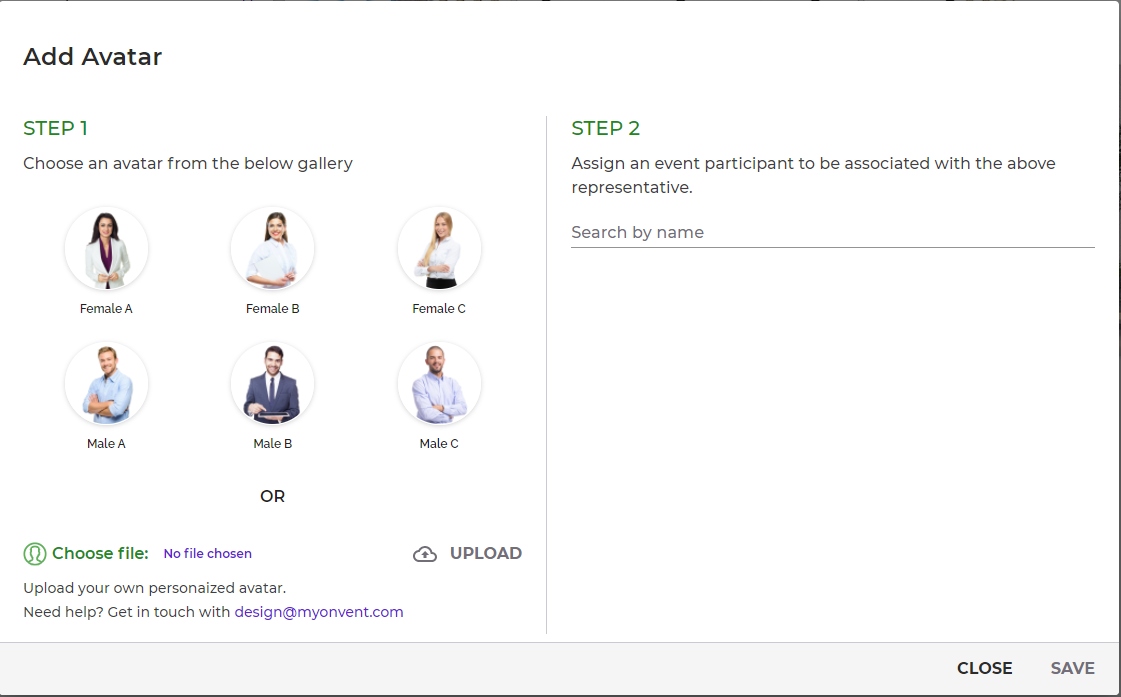
6. Add Representatives
Before adding a Representative, be sure that they have be registered for the event already as a Participant here: myOnvent – Next generation online events
You might choose from standard avatars or upload a picture of your choice.
A few suggestions for a picture in the Booth look better:
Use an image without a background (you can remove a background from your picture with this free online tool: https://www.remove.bg/, or by using Photoshop/other similar apps.)
We would suggest using a picture of the upper body (usually from the belt and upwards) and a good resolution image (up to 2 MB).
It’s possible to have up to 6 representatives for each booth: two in the front and 4 additional on the left side of the booth.
*After adding a representative, please click SAVE.
You Representative will receive a Chat message each time a visitor will press on your Avatar. If you are not logged in at the time, you will be able to overview the messages next time you will enter the event platform.
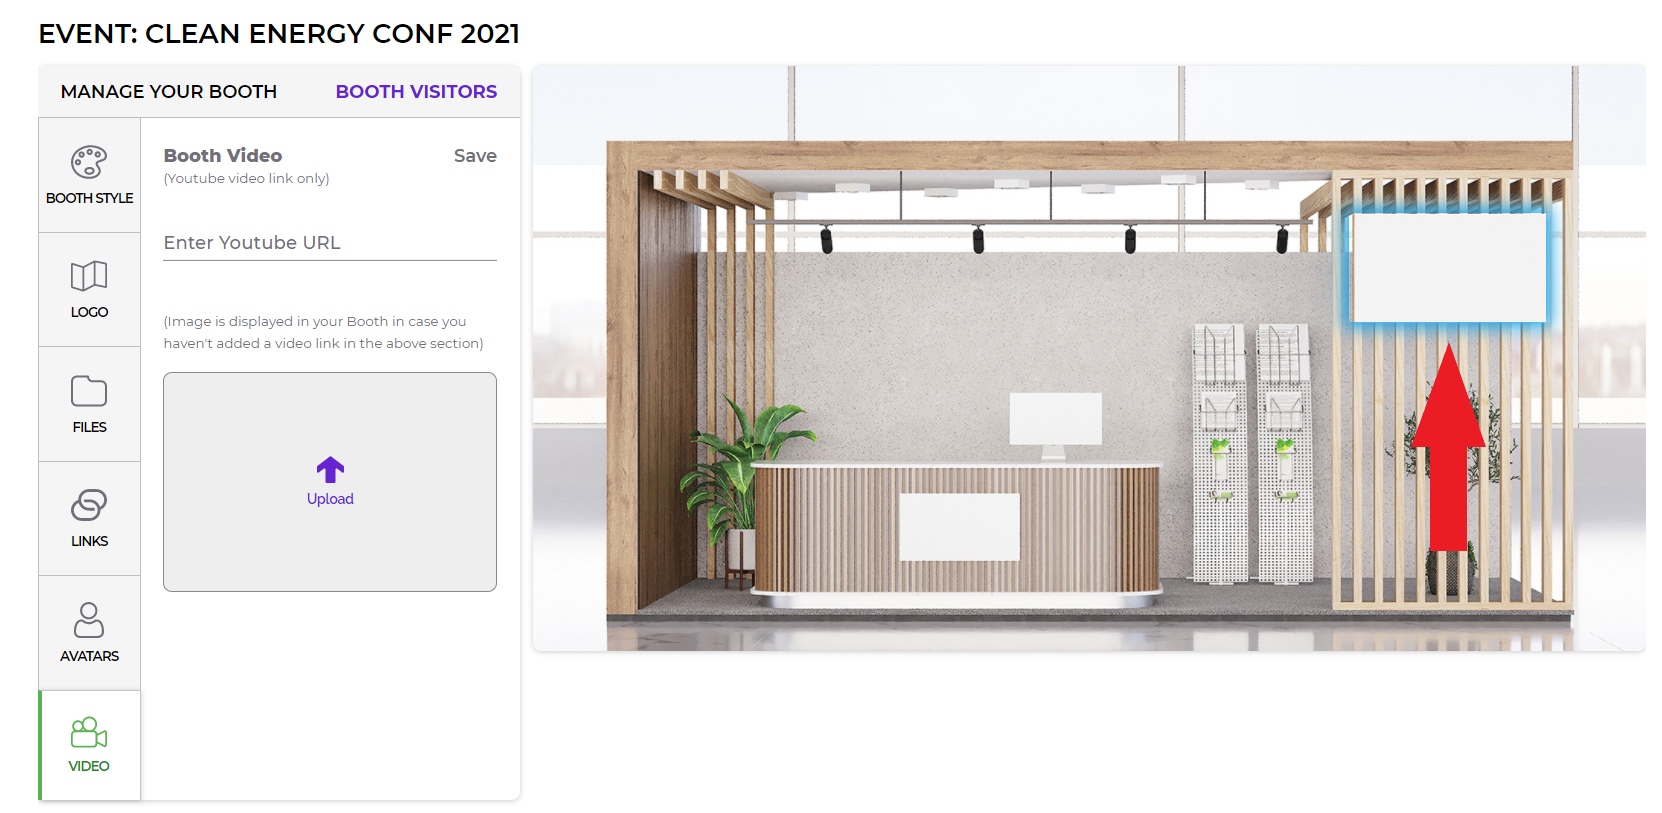
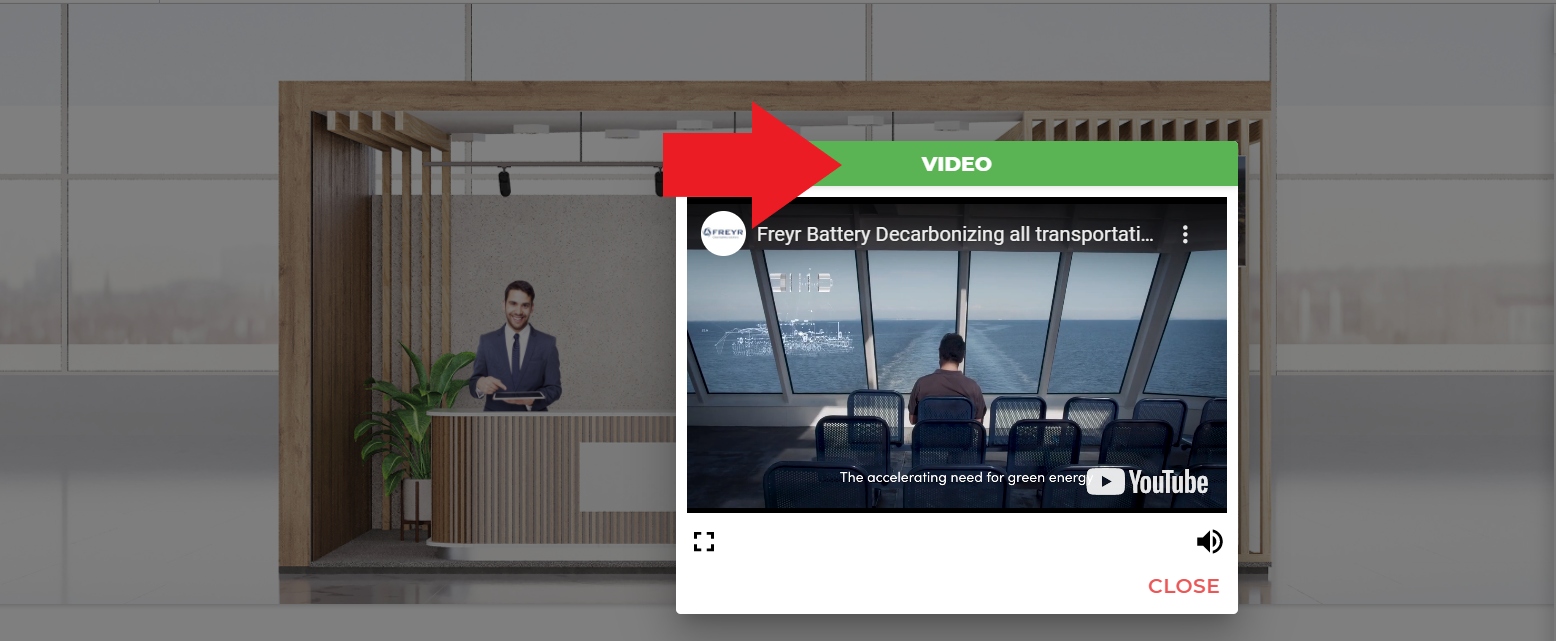
7. Add a YouTube video link or an image to your Booth screen
8. You can see your Booth statistics and Visitors
Booth visitors are counted every time someone visits your Booth, but you can see a specific user only at the time he/she is visiting your Booth.

9. You are welcome to engage with the Participants
Each Exhibitor has a “Booth wall” visible to all Participants who will visit the booth. We recommend writing a short description of your company, invite visitors to ask questions by pressing on your Booth Representative, or share general comments on your Booth wall. You can create “Group Chats” (Chats->New Chat) or have a 1on1 video call.
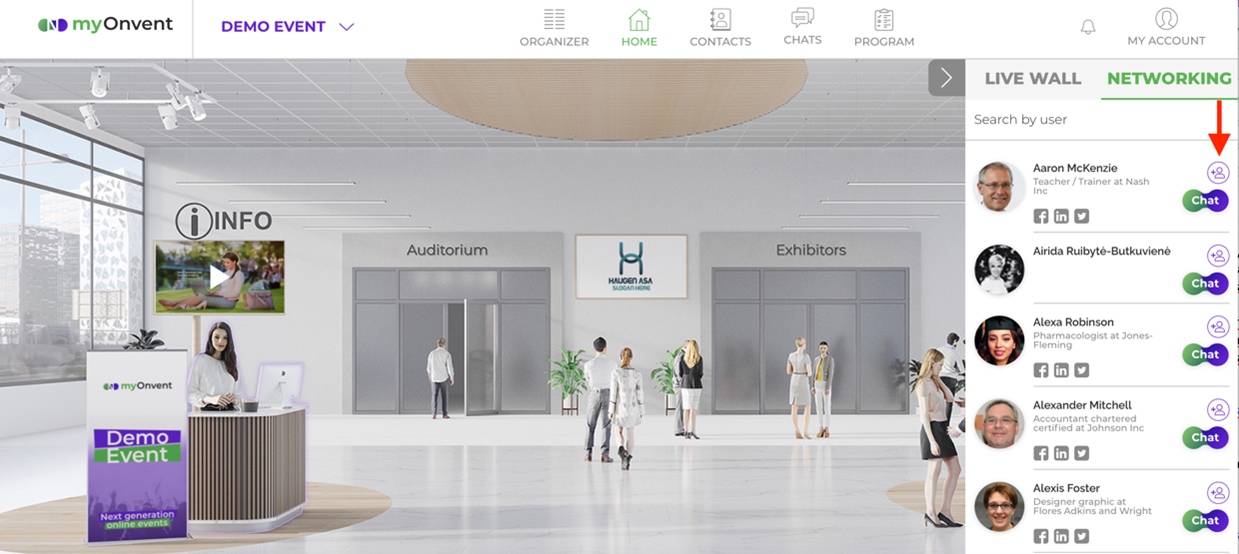
10. Find all registered Participants at the NETWORKING section in the Lobby.
You can add participants to your Contacts by pressing an icon next to the Name or send a message by pressing a “Chat” icon.
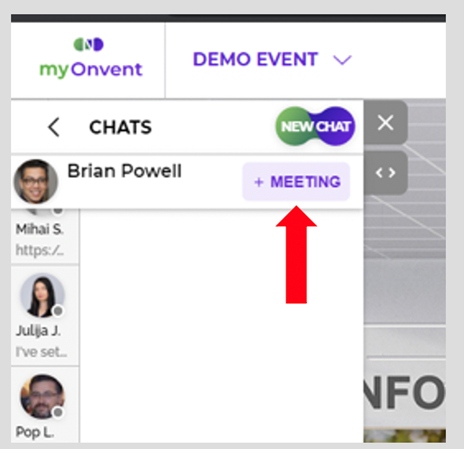
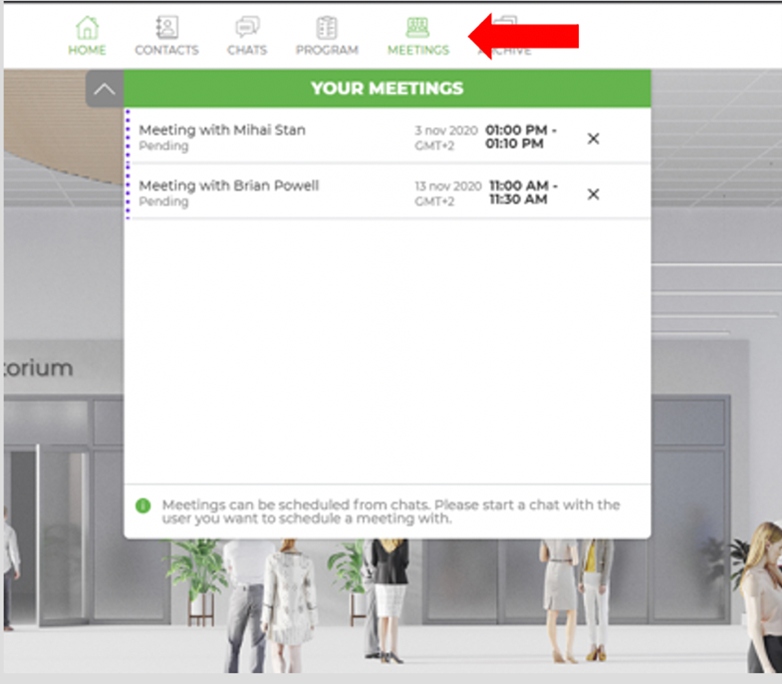
11. Schedule a Meeting with a user.
Start a CHAT with a user and click on MEETING. Check your Meetings by Clicking on the “Meetings” tab.
Enjoy the conference!